Toggle navigation
首页
问答
文章
积分商城
专家
专区
更多专区...
文档中心
返回主站
搜索
提问
会员
中心
登录
注册
零代码玩转OTA升级
发布于 2020-06-22 09:34:56 浏览:2434
订阅该版
[tocm] * 本帖最后由 Aladdin-Wang 于 2020-6-22 09:37 编辑 * **前言:** 前边讲过stm32通用bootloader的实现方法,没有看过的,可以参考这一篇文章:[STM32通用Bootloader——FOTA](https://blog.csdn.net/sinat_31039061/article/details/106344081),这一篇将在上篇bootloader的基础上,介绍app如何通过多种固件下载器实现OTA升级。 先看下演示视频,此视频演示了四种升级方式,分别是: 1. 阿里云物联网平台OTA 2. HTTP OTA 3. Ymodem OTA 4. 不用app,使用Bootloader中的Ymodem OTA 演示视频:[https://www.bilibili.com/video/bv1zK411p7uH](https://www.bilibili.com/video/bv1zK411p7uH) 此项目硬件使用的是STM32F429开发板,代码全部使用RT-Thread Studio搭积木的方式实现,仅仅改动了几行代码,开发效率非常高。此项目的地址:[https://gitee.com/Aladdin-Wang/RT-FOTA-STM32L431.git](https://gitee.com/Aladdin-Wang/RT-FOTA-STM32L431.git) **使用到的软件包和组件:** 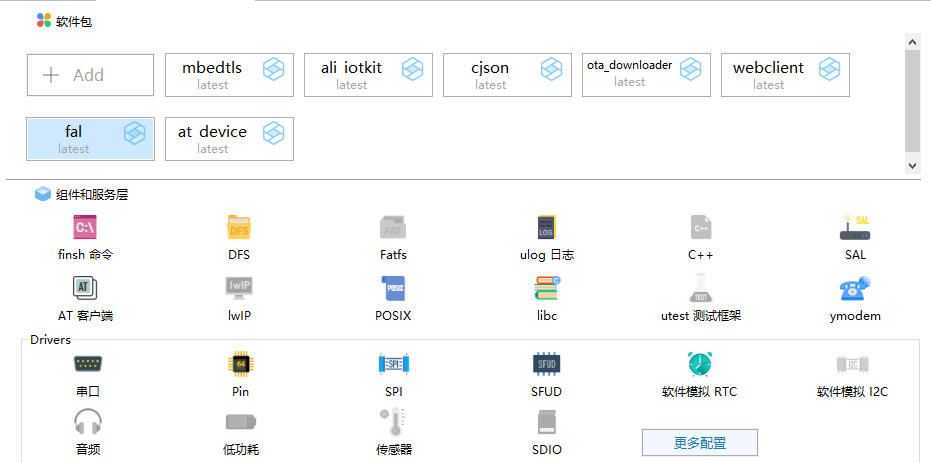 ### 1.准备工作 #### 1.1 新建工程 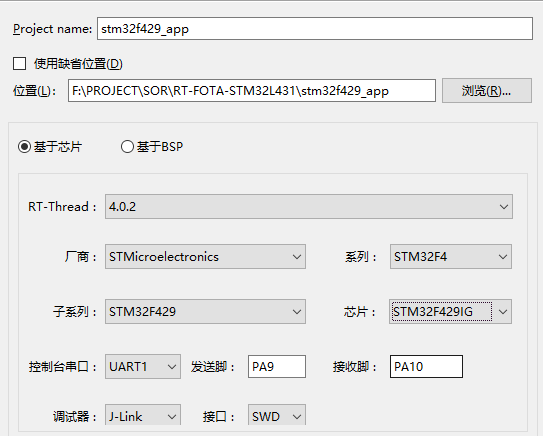 由于此项目使用的esp8266需要一个串口,我使用的是uart2,所以需要还需要配置uart2 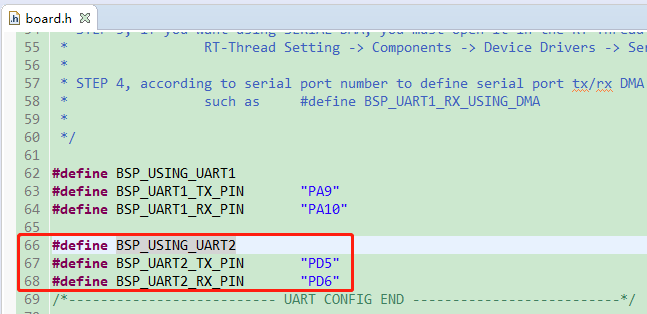 **增加uart接收缓冲区大小:**  #### 1.2 打开fal和at device软件包 **打开fal软件包**  **配置sfud组件** 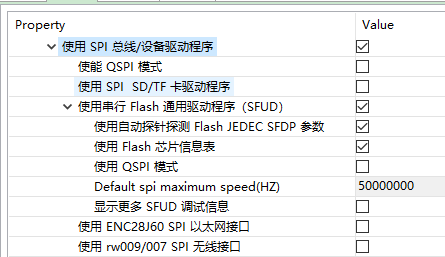 **配置SPI** 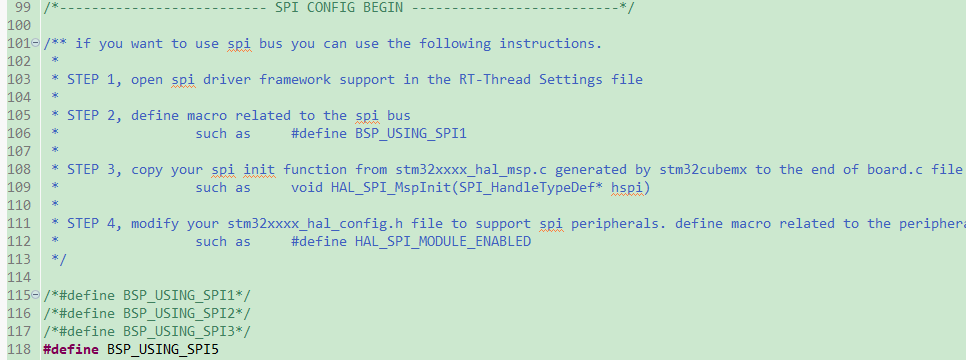 **配置fal_cfg.h** ```c #ifndef _FAL_CFG_H_ #define _FAL_CFG_H_ #include <rtconfig.h> #include <board.h> #define FLASH_SIZE_GRANULARITY_16K (4 * 16 * 1024) #define FLASH_SIZE_GRANULARITY_64K (64 * 1024) #define FLASH_SIZE_GRANULARITY_128K (7 * 128 * 1024) #define STM32_FLASH_START_ADRESS_16K STM32_FLASH_START_ADRESS #define STM32_FLASH_START_ADRESS_64K (STM32_FLASH_START_ADRESS_16K + FLASH_SIZE_GRANULARITY_16K) #define STM32_FLASH_START_ADRESS_128K (STM32_FLASH_START_ADRESS_64K + FLASH_SIZE_GRANULARITY_64K) /* ===================== Flash device Configuration ========================= */ extern const struct fal_flash_dev stm32_onchip_flash_16k; extern const struct fal_flash_dev stm32_onchip_flash_64k; extern const struct fal_flash_dev stm32_onchip_flash_128k; extern struct fal_flash_dev nor_flash0; /* flash device table */ #define FAL_FLASH_DEV_TABLE \ { \ &stm32_onchip_flash_16k, \ &stm32_onchip_flash_64k, \ &stm32_onchip_flash_128k, \ &nor_flash0, \ } /* ====================== Partition Configuration ========================== */ #ifdef FAL_PART_HAS_TABLE_CFG /* partition table */ #define FAL_PART_TABLE \ { \ {FAL_PART_MAGIC_WROD, "bootloader", "onchip_flash_16k", 0 , FLASH_SIZE_GRANULARITY_16K , 0}, \ {FAL_PART_MAGIC_WROD, "param", "onchip_flash_64k", 0 , FLASH_SIZE_GRANULARITY_64K , 0}, \ {FAL_PART_MAGIC_WROD, "app", "onchip_flash_128k", 0 , FLASH_SIZE_GRANULARITY_128K, 0}, \ {FAL_PART_MAGIC_WROD, "ef", "W25Q128", 0 , 1024 * 1024, 0}, \ {FAL_PART_MAGIC_WROD, "download", "W25Q128", 1024 * 1024 , 512 * 1024, 0}, \ {FAL_PART_MAGIC_WROD, "factory", "W25Q128", (1024 + 512) * 1024 , 512 * 1024, 0}, \ } #endif /* FAL_PART_HAS_TABLE_CFG */ #endif /* _FAL_CFG_H_ */ ``` **初始化spi flash和fal软件包** ```c #include <rtthread.h> #include "spi_flash.h" #include "spi_flash_sfud.h" #include "drv_spi.h" #if defined(RT_USING_SFUD) static int rt_hw_spi_flash_init(void) { __HAL_RCC_GPIOF_CLK_ENABLE(); rt_hw_spi_device_attach("spi5", "spi50", GPIOF, GPIO_PIN_6); if (RT_NULL == rt_sfud_flash_probe("W25Q128", "spi50")) { return -RT_ERROR; } return RT_EOK; } INIT_COMPONENT_EXPORT(rt_hw_spi_flash_init); #endif ``` ```c int fs_init(void) { /* partition initialized */ fal_init(); return 0; } INIT_ENV_EXPORT(fs_init); ``` **配置at device软件包** 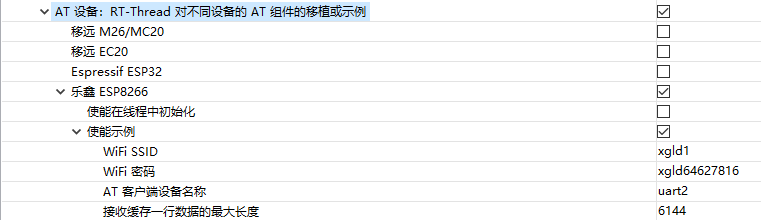 #### 1.3 配置中断重定向 ```c /** * Function ota_app_vtor_reconfig * Description Set Vector Table base location to the start addr of app(RT_APP_PART_ADDR). */ static int ota_app_vtor_reconfig(void) { #define NVIC_VTOR_MASK 0x3FFFFF80 /* Set the Vector Table base location by user application firmware definition */ SCB->VTOR = 0x8020000 & NVIC_VTOR_MASK; return 0; } INIT_BOARD_EXPORT(ota_app_vtor_reconfig); ``` 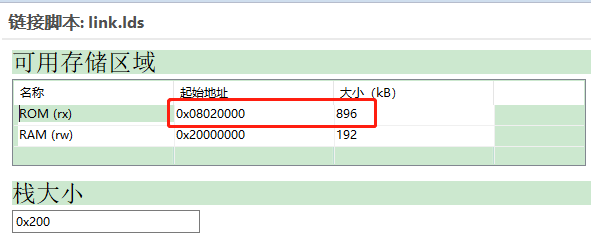 **烧录bootloader:** bootloader的制作方法请参考官方的教程[https://www.rt-thread.org/document/site/application-note/system/rtboot/an0028-rtboot/](https://www.rt-thread.org/document/site/application-note/system/rtboot/an0028-rtboot/)或者[https://blog.csdn.net/sinat_31039061/article/details/106344081](https://blog.csdn.net/sinat_31039061/article/details/106344081)
查看更多
3
个回答
默认排序
按发布时间排序
Aladdin-Wang
认证专家
2020-06-22
这家伙很懒,什么也没写!
[md]### 2.阿里云物联网平台OTA **注册 LinkPlatform 平台** 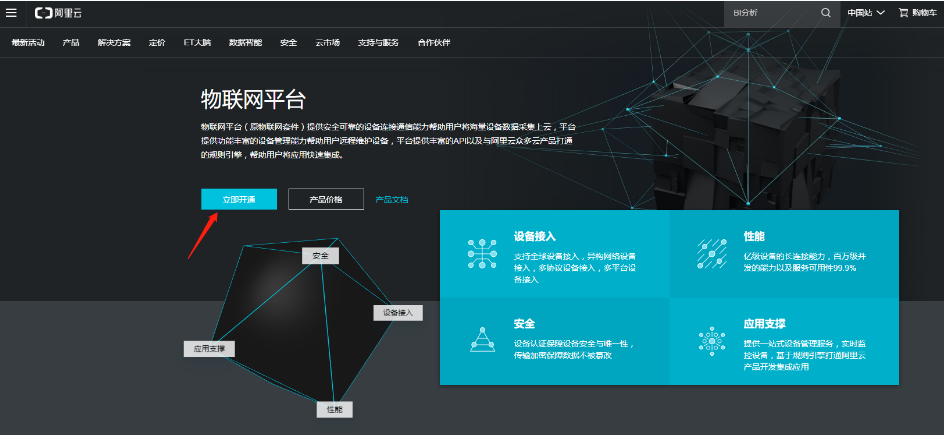 **创建产品** 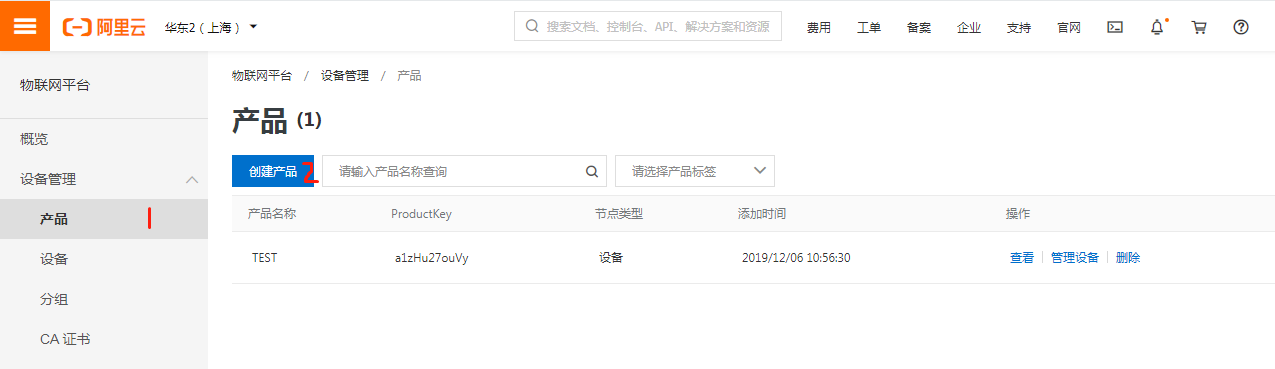 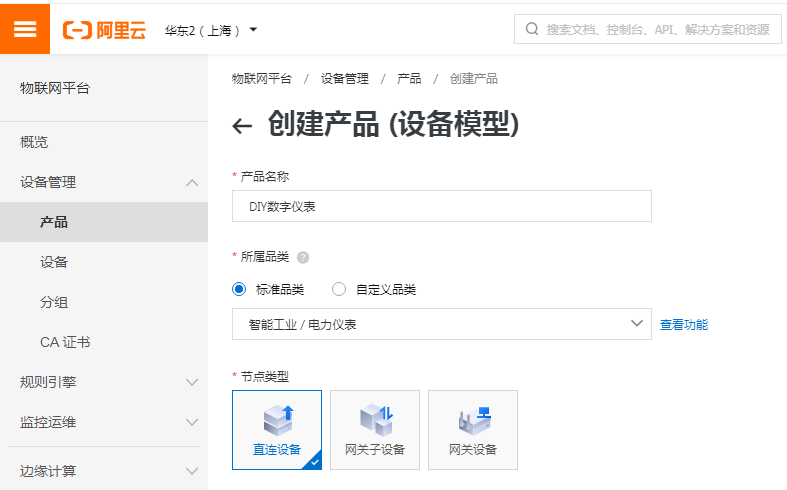 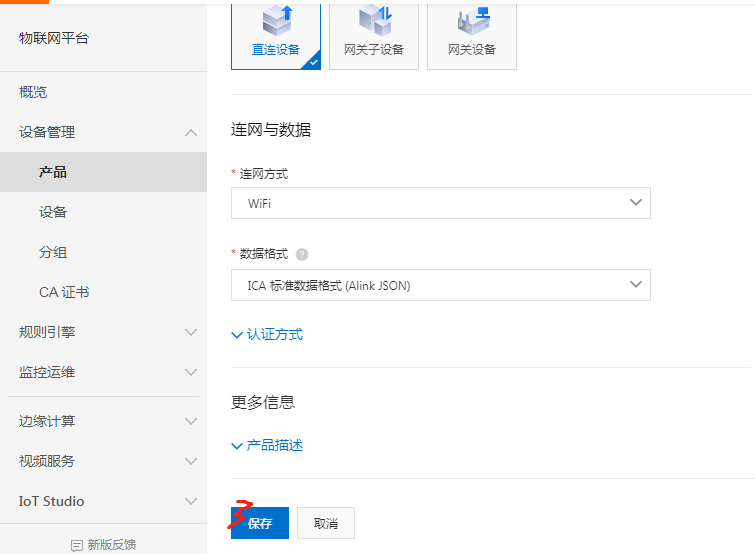 产品详情:  **添加设备** 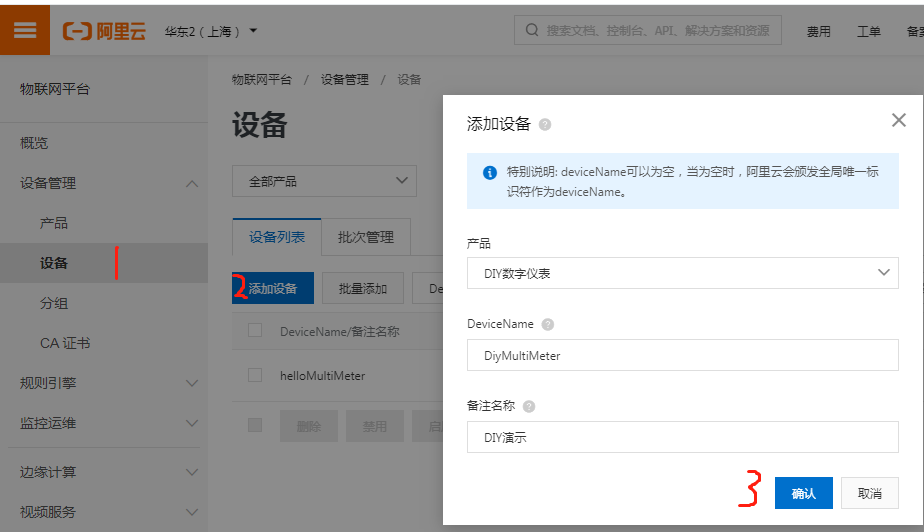 **添加自定义Topic**  **配置ali iotkit软件包** 将刚才新建的阿里云设备信息填写到配置信息里:  将软件包的示例mqtt-example.c和ota_mqtt-example.c拷贝到applications目录备用 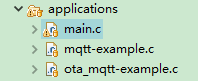 **配置mbedtls软件包** 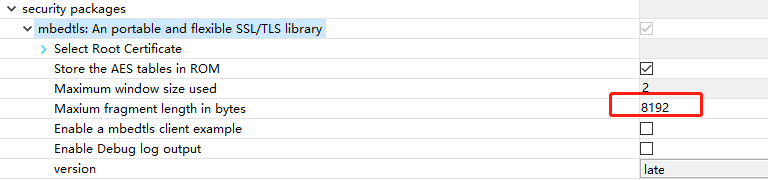 **更改ota_mqtt-example.c中的部分代码:** ```c static int _ota_mqtt_client(void) { #define OTA_BUF_LEN (16385) #define DEFAULT_DOWNLOAD_PART "download" int rc = 0, ota_over = 0; void *pclient = NULL, *h_ota = NULL; iotx_conn_info_pt pconn_info; iotx_mqtt_param_t mqtt_params; // FILE *fp; static char buf_ota[OTA_BUF_LEN]; const struct fal_partition * dl_part = RT_NULL; // if (NULL == (fp = fopen("ota.bin", "wb+"))) { // EXAMPLE_TRACE("open file failed"); // goto do_exit; // } /**< get device info*/ HAL_GetProductKey(g_product_key); HAL_GetDeviceName(g_device_name); HAL_GetDeviceSecret(g_device_secret); /**< end*/ /* Device AUTH */ if (0 != IOT_SetupConnInfo(g_product_key, g_device_name, g_device_secret, (void **)&pconn_info)) { EXAMPLE_TRACE("AUTH request failed!"); rc = -1; goto do_exit; } /* Initialize MQTT parameter */ memset(&mqtt_params, 0x0, sizeof(mqtt_params)); mqtt_params.port = pconn_info->port; mqtt_params.host = pconn_info->host_name; mqtt_params.client_id = pconn_info->client_id; mqtt_params.username = pconn_info->username; mqtt_params.password = pconn_info->password; mqtt_params.pub_key = pconn_info->pub_key; mqtt_params.request_timeout_ms = 2000; mqtt_params.clean_session = 0; mqtt_params.keepalive_interval_ms = 60000; mqtt_params.read_buf_size = OTA_MQTT_MSGLEN; mqtt_params.write_buf_size = OTA_MQTT_MSGLEN; mqtt_params.handle_event.h_fp = event_handle; mqtt_params.handle_event.pcontext = NULL; /* Construct a MQTT client with specify parameter */ pclient = IOT_MQTT_Construct(&mqtt_params); if (NULL == pclient) { EXAMPLE_TRACE("MQTT construct failed"); rc = -1; goto do_exit; } h_ota = IOT_OTA_Init(g_product_key, g_device_name, pclient); if (NULL == h_ota) { rc = -1; EXAMPLE_TRACE("initialize OTA failed"); goto do_exit; } do { uint32_t firmware_valid; EXAMPLE_TRACE("wait ota upgrade command...."); /* handle the MQTT packet received from TCP or SSL connection */ IOT_MQTT_Yield(pclient, 200); if (IOT_OTA_IsFetching(h_ota)) { uint32_t last_percent = 0, percent = 0; char md5sum[33]; char version[128] = {0}; uint32_t len, size_downloaded, size_file; IOT_OTA_Ioctl(h_ota, IOT_OTAG_FILE_SIZE, &size_file, 4); /* Get download partition information and erase download partition data */ if ((dl_part = fal_partition_find(DEFAULT_DOWNLOAD_PART)) == RT_NULL) { LOG_E("Firmware download failed! Partition (%s) find error!", "download"); rc = -1; goto do_exit; } LOG_I("Start erase flash (%s) partition!", dl_part->name); if (fal_partition_erase(dl_part, 0, size_file) < 0) { LOG_E("Firmware download failed! Partition (%s) erase error!", dl_part->name); rc = -1; goto do_exit; } LOG_I("Erase flash (%s) partition success!", dl_part->name); rt_uint32_t content_pos = 0, content_write_sz; do { len = IOT_OTA_FetchYield(h_ota, buf_ota, OTA_BUF_LEN, 1); if (len > 0) { content_write_sz = fal_partition_write(dl_part, content_pos, (uint8_t *)buf_ota, len); if (content_write_sz != len) { LOG_I("Write OTA data to file failed"); IOT_OTA_ReportProgress(h_ota, IOT_OTAP_BURN_FAILED, RT_NULL); goto do_exit; } else { content_pos = content_pos + len; LOG_I("receive %d bytes, total recieve: %d bytes", content_pos, size_file); } } else { IOT_OTA_ReportProgress(h_ota, IOT_OTAP_FETCH_FAILED, NULL); EXAMPLE_TRACE("ota fetch fail"); } /* get OTA information */ IOT_OTA_Ioctl(h_ota, IOT_OTAG_FETCHED_SIZE, &size_downloaded, 4); IOT_OTA_Ioctl(h_ota, IOT_OTAG_FILE_SIZE, &size_file, 4); last_percent = percent; percent = (size_downloaded * 100) / size_file; if (percent - last_percent > 0) { IOT_OTA_ReportProgress(h_ota, percent, NULL); } IOT_MQTT_Yield(pclient, 100); } while (!IOT_OTA_IsFetchFinish(h_ota)); IOT_OTA_Ioctl(h_ota, IOT_OTAG_MD5SUM, md5sum, 33); IOT_OTA_Ioctl(h_ota, IOT_OTAG_VERSION, version, 128); IOT_OTA_Ioctl(h_ota, IOT_OTAG_CHECK_FIRMWARE, &firmware_valid, 4); if (0 == firmware_valid) { EXAMPLE_TRACE("The firmware is invalid"); } else { EXAMPLE_TRACE("The firmware is valid"); IOT_OTA_ReportVersion(h_ota, version); LOG_I("Download firmware to flash success."); LOG_I("System now will restart..."); HAL_SleepMs(1000); /* Reset the device, Start new firmware */ extern void rt_hw_cpu_reset(void); rt_hw_cpu_reset(); } ota_over = 1; } HAL_SleepMs(2000); } while (!ota_over); HAL_SleepMs(1000); do_exit: if (NULL != h_ota) { IOT_OTA_Deinit(h_ota); } if (NULL != pclient) { IOT_MQTT_Destroy(&pclient); } return rc; } ``` **编译工程,将bin文件上传到阿里云:** 阿里云不支持rbl格式的文件,直接将rt_ota_packaging_tool生成的rbl文件后缀改为bin,上传即可。 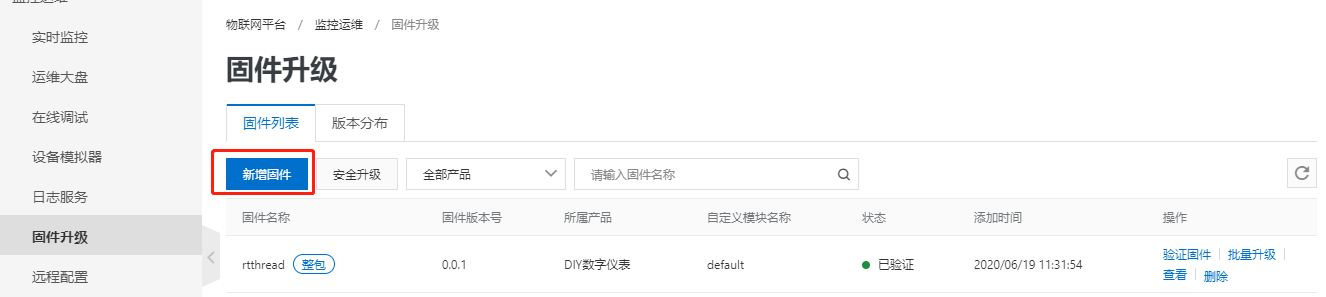 最后使用ali_ota_sample命令升级:  ### 3.HTTP OTA和Ymodem OTA 配置ota_downloader软件包  如果暂时没有自己的服务器,可以使用MyWebServer进行测试: 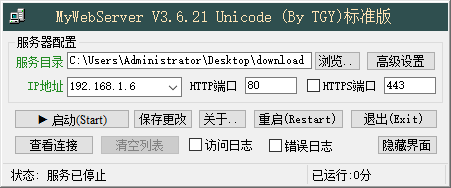 配置完MyWebServer,可以打开浏览器输入IP地址查看: 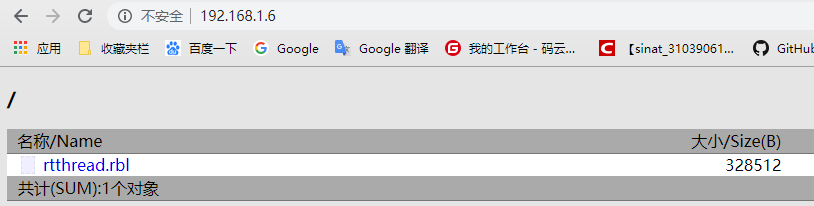 使用http_ota命令进行http_ota升级:  使用ymodem_ota命令进行ymodem_ota升级:  ### 4.不适用APP进行升级 rt-fota集成了ymodem_ota,上电短按恢复出厂设置按钮即可进入rt-fota命令行模式,通过ymodem_ota命令即可进行升级: 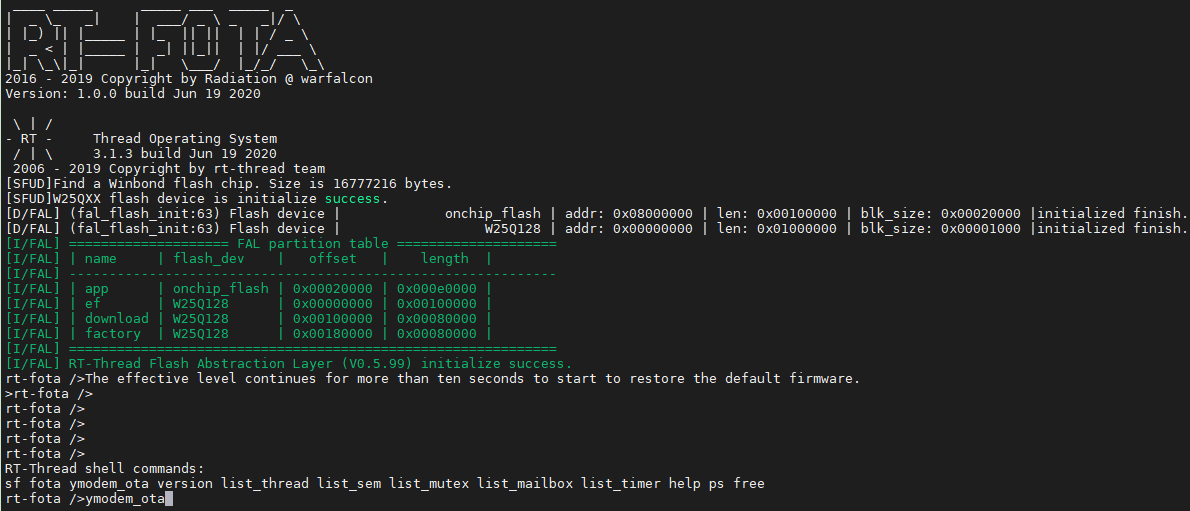 联系作者: 欢迎关注本人公众号,加群交流: [/md]
Aladdin-Wang
认证专家
2020-06-22
这家伙很懒,什么也没写!
原文地址:[https://blog.csdn.net/sinat_31039061/article/details/106790838](https://blog.csdn.net/sinat_31039061/article/details/106790838)
jerry2cool
2020-06-24
这家伙很懒,什么也没写!
感谢分享。。。。
pkokoc
2020-06-29
这家伙很懒,什么也没写!
看起来不错,感谢分享
撰写答案
登录
注册新账号
关注者
0
被浏览
2.4k
关于作者
Aladdin-Wang
这家伙很懒,什么也没写!
提问
5
回答
39
被采纳
7
关注TA
发私信
相关问题
推荐文章
1
RT-Thread应用项目汇总
2
玩转RT-Thread系列教程
3
国产MCU移植系列教程汇总,欢迎查看!
4
机器人操作系统 (ROS2) 和 RT-Thread 通信
5
【技术三千问】之《玩转ART-Pi》,看这篇就够了!干货汇总
6
五分钟玩转RT-Thread新社区
7
关于STM32H7开发板上使用SDIO接口驱动SD卡挂载文件系统的问题总结
8
STM32的“GPU”——DMA2D实例详解
9
RT-Thread隐藏的宝藏之completion
10
【ART-PI】RT-Thread 开启RTC 与 Alarm组件
最新文章
1
V5.2.1 魔改以支持多核处理器从任意核启动
2
【RSOC25】Day5 课程笔记:软件包相关知识
3
RT-Thread 夏令营 第五天笔记
4
【RSOC25】Day5 课程笔记:软件包和网络组件
5
【RSOC25】Day4 课程笔记:I/O设备和驱动框架
热门标签
RT-Thread Studio
串口
Env
LWIP
SPI
Bootloader
AT
Hardfault
CAN总线
ART-Pi
FinSH
DMA
USB
文件系统
RT-Thread
SCons
RT-Thread Nano
线程
MQTT
STM32
FAL
RTC
rt-smart
cubemx
I2C_IIC
UART
WIZnet_W5500
BSP
ESP8266
PWM
ota在线升级
packages_软件包
flash
freemodbus
GD32
潘多拉开发板_Pandora
编译报错
ADC
keil_MDK
flashDB
rt_mq_消息队列_msg_queue
ulog
socket
MicroPython
msh
中断
Debug
SFUD
at_device
SDIO总线
本月问答贡献
Ryan_CW
6
个答案
4
次被采纳
sakumisu
3
个答案
3
次被采纳
D1sguIse_
6
个答案
2
次被采纳
wdfk_prog
6
个答案
1
次被采纳
三世执戟
5
个答案
1
次被采纳
本月文章贡献
出出啊
1
篇文章
2
次点赞
小小李sunny
1
篇文章
1
次点赞
张世争
1
篇文章
2
次点赞
crystal266
2
篇文章
1
次点赞
whj467467222
2
篇文章
1
次点赞
回到
顶部
发布
问题
分享
好友
手机
浏览
扫码手机浏览
投诉
建议
回到
底部


